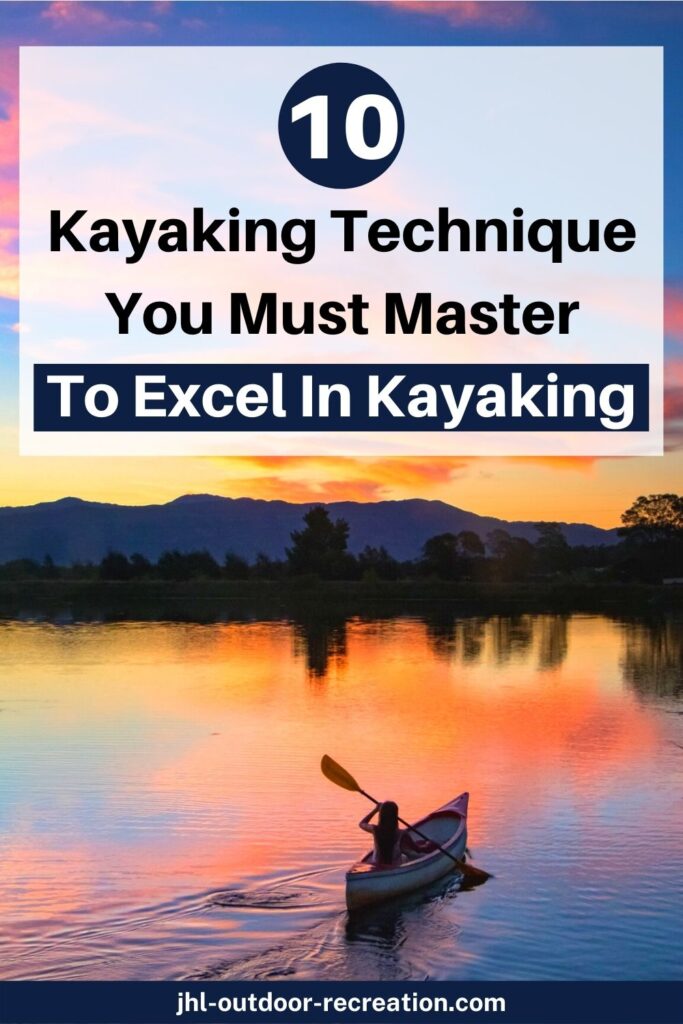
Have you ever wondered how many kayaking skills you need to excel in kayaking?
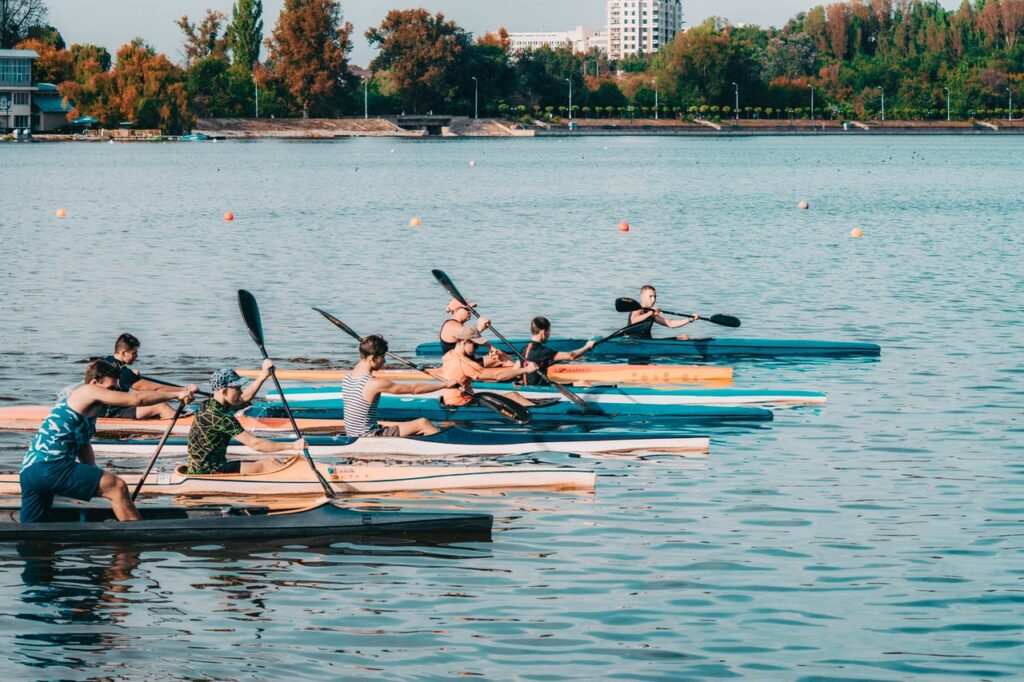
So, you’d probably recall watching K1 Canoe Sprint event. Those paddlers sprint in a straight line.
Then, you have a few kayaking skills in your mind to help paddle fast in a straight line.
But, do you know that kayaking is not merely about moving forward, but also maneuvering? – Don’t you agree with that?
Let’s take driving as an example. Apart from pressing the gas pedal to move forward, you also need to know how to steer the car, right?
This is exactly the same as kayaking. Kayaking is just like steering a vehicle on water.
And if we can’t maneuver well, this can be dangerous.
So, to be great in kayaking, not only do we need skills to paddle forward better, but also to be great in maneuvering. – Ultimately, we want to paddle safely.
Therefore, let’s discuss 10 kayaking skills you should master to excel in kayaking.
1. Paddle holding
The day that you first learned driving, you checked everything before driving. You were so focused on the way to control the pedals and gears.
You didn’t learn to hold the steering wheel. But, it was so natural and you didn’t have any problem at all.
In kayaking, paddles are steering wheels. So, you might grab a paddle and hop into a kayak. Then, you start paddling right away.
Nonetheless, you realize paddling is tiring. And you wrists and arms might be sore.
Guess what. You might hold the paddle wrongly.
Unlike holding steering wheel, there are several factors to help you hold paddle right.
1.1 Place
Hold the paddle and place the centre of the paddle right above your head. Usually, it is where two blades connect, ie. ferrule.
Make sure your arms form RIGHT angle.
1.2 Shape
The shapes of blades are often asymmetrical. One side of the edge is longer than the other side.
When holding your blade, the longer edge should face above. – So, the shorter side would face the water.
1.3 Surface
The surface of blade is UNEVEN, as there are always both CONCAVE and CONVEX.
To hold the paddle right, make sure the concave surface facing towards you.
1.4 Firmness
It’s common to hold the paddle tight. – But, we should avoid doing this when holding paddles.
Don’t lock your grip. Try to hold it firm but flexibly, so it allows the shafts “rotate” when you paddle.
To give you a better picture, you can hold it with “OK” sign.
1.5 Feathered paddles
With that being said, there is a slight variant in holding feathered paddles, due to controlled and non-controlled hands.
- Controlled hand – Usually is your dominant hand. Hold the shaft firm and move your wrist up and down when paddling.
- Non-controlled hand – Hold the shaft with flexible grip (eg, “OK” sign) when paddling. Minimize your wrist movement.
FYI, right feathered paddles are more common than left ones. – This could be due to right-handed dominance.
1.5.1 Right feathered paddles
Here’s how you identify a right feathered paddle.
Take your right blade (concave) facing towards you as the reference point. The left blade (concave) will be facing upward or tilting, depending on the angle of offsetting.
1.5.2 Left feathered paddles
They’re the total opposite of right feathered paddles.
Take your left blade (concave) facing you as the reference point. The right blade (concave) will be facing upward or tilting, depending on the angle of offsetting.
Make sure you get the correct feathered paddles. If not, paddling will be skewed and awkward.
2. Enter and exit kayak
Before learning how to paddle, learn how to enter and exit kayak properly.
That’s because doing the wrong way can make you lose balance and slip. So, you might get hurt or knock your head.
Nonetheless, this is always an overlooked area when it comes to knowing proper kayaking skills.
But, you can easily avoid this and learn the right way!
2.1 Enter kayak
You can launch your kayak from SHORE or DOCK. The techniques differ slightly, though.
2.1.1 Shore
- Step 1 – Place your kayak facing towards the water (lake or sea).
- Step 2 – Place your paddle on either side of the kayak, so the paddle is parallel to the shore. The paddle should be placed behind the seat.
- Step 3 – Enter the kayak from that side with one hand pressing the paddle.
- Step 4 – Sit and grab the paddle. Then, start paddling.
2.1.2 Dock
- Step 1 – Place your kayak parallel and next to the dock.
- Step 2 and 3 – As above. However, make sure there is another person being with you to help you stabilize.
- Step 4 – Sit and grab the paddle. Push the dock and start paddling.
2.2 Exit kayak
Paddle your kayak towards the dock or shore.
The exit steps are similar to the above steps, but in OPPOSITE manner.
3. Kayaking strokes
Bread and butter of kayaking. Hands down!
Kayaking essentially is “driving” on water. We move FORWARD and MANEUVER in any direction we want.
On top of that, there is an interesting physics principle that is related to kayaking. – That is Newton’s 3rd Law of Motion.
Whenever we exert force in a specific direction, there would be force acting in the opposite direction.
Besides, the ways that we maneuver vary, so we could possibly mix-and-match any sorts of strokes. – Hence, learning proper strokes could be complex.
But, these could be broken down into the following common strokes.
3.1 Forward
Place the blade in the water of bow’s section. Then, draw the blade to the back (stern) to create forward motion.
Rotate your torso while drawing and paddle the other side.
3.2 Reverse
This is the exact opposite of forward stroke. We use this to either slow down or navigate in reverse manner.
Place the blade in the water of stern’s section. Then draw the blade to the front (bow) to create backward motion.
Rotate your torso while drawing and paddle the other side.
3.3 Sweep and reverse sweep
Sweep stroke is similar to forward stroke, but it is used to TURN the kayak.
If you want to turn to the LEFT, place the blade in the water of RIGHT bow’s section. Then, draw a SEMI-CIRCLE.
Do the same at the left hand side if you want to turn to the right.
Also, you can do it in REVERSE manner, hence called reverse sweep. And this is totally opposite of sweep stroke. – So, you will turn to the SAME side.
In essence, paddlers draw semi-circle from the stern to the bow.
If you want to turn to the left, draw the semi-circle at the left side. And vice versa.
3.4 Draw
This stroke allows kayaks move PERPENDICULARLY. This stroke is useful when you want to move your kayak towards the dock / shore or other paddlers.
There are 2 forms of this, ie. basic draw and sculling draw.
3.4.1 Basic draw
Extend your blade and place it in the water away from the you. The concave side faces towards the kayak. Pull the blade towards you, so your kayak moves towards the blade.
3.4.2 Sculling draw
This is slightly more advanced, powerful than basic draw stroke.
The motion is just like sculling when treading water in swimming. Your hands move back and forward to create an uplift motion.
Same goes to sculling draw stroke. The blades are like your hands. Scull the blade so the kayak moves towards the blade.
3.5 Rudder
To me, rudder is an advanced skill as paddlers need to be familiar with EDGING (discussed below).
Unlike the above, rudder has to be done when kayak is MOVING. Essentially, it uses moving motion to help change the direction.
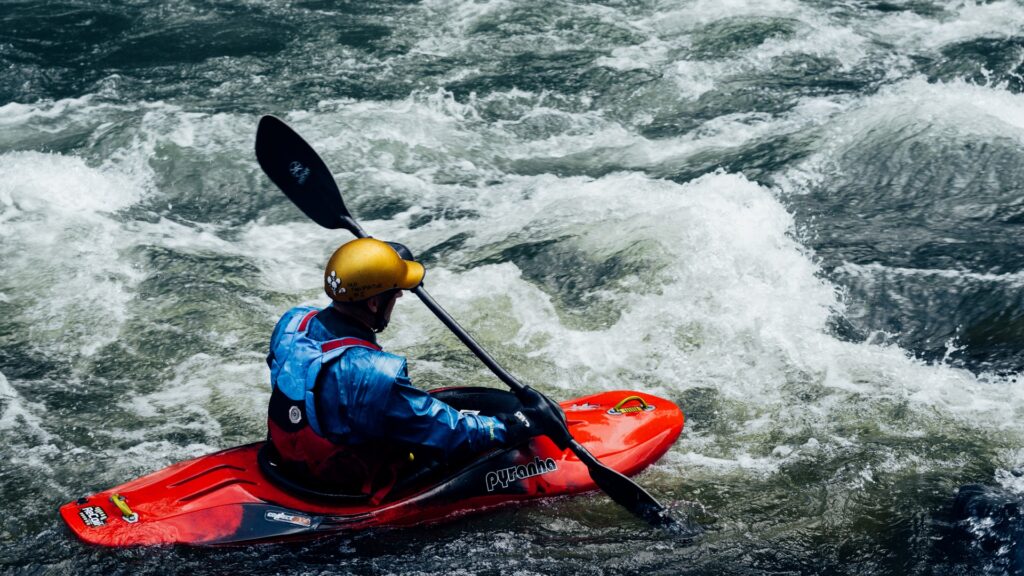
Moreover, rudder is critical for whitewater and sea kayaking. Get ready to master this if you want to paddle whitewater or on the ocean.
With that being said, there are 2 types of rudder:
3.5.1 Bow rudder
This helps you TURN without losing speed.
Let’s say you want to turn to right side. When the kayak is moving, EDGE your body to the left and place the blade in the water of right bow’s section.
Keep that position. You will notice your kayak will turn to the right side.
Do the opposite if you want to turn to the left side.
3.5.2 Stern rudder
This is used in downwind environment, which hinders your kayak from moving straight.
Hence, paddlers use stern rudder to adjust the direction, so the kayak can move straight.
Same technique as above, but you just need to place the blade in the water of stern’s section.
4. Posture and vision
Many people like to lean their back when paddling, including me. – Well, who doesn’t like to do that to chill and enjoy the moment?
However, I can’t deny that this is a bad habit.
Even for recreational paddling, always sit UPRIGHT.
Why? That’s because sitting upright improve paddling range of motion. Meaning, it improves paddling efficiency.
Besides, we can also slightly lean our body forward when paddling fast or sprinting. That’s why you can see a lot of K1 sprinters have this sitting posture.
What about vision? Why is it so important to paddling?
Vision is the first navigation tool, regardless of types of activities. Our vision determines the direction we want to go, so it affects our body movement. – Hence, vision affects DEXTERITY.
So, when you are paddling forward, it’s always a bad idea to look anywhere but forward. You know you won’t be paddling fast and in a straight line.
5. Paddling
The biggest belief on kayaking is it is an arm-dominant activity. So, those elite sprinters have broad, thick shoulders.
Well, this is not the whole picture. Although arms are vital, kayaking is a FULL body activity in essence.
For this purpose, paddling can be broken down into 2 parts:
5.1 Torso rotation
I must confess. I knew nothing when I just started kayaking. So, my paddling skill was really terrible.
I tried to pull as hard as I could when paddling. And I didn’t even rotate my torso. – You know this is the worst possible paddling style.
To paddle the efficient way, here are the points we must take note:
- We must ROTATE our body. So, our CORE strength plays an important role here.
- Instead of only pulling the paddle, we should both PUSH and PULL the paddle.
Nonetheless, we can further look into paddling styles and phases.
5.1.1 Paddling styles
5.1.1.1 Low-angled paddling
This paddling style is relaxing. The top arms of paddlers are at shoulder level, whereas the bottom arms are below shoulder level.
The role of each arm exchanges BELOW shoulder level.
Hence, you expect paddlers adopt this paddling style for recreational purpose.
5.1.1.2 High-angled paddling
In contrast, this is an aggressive paddling style. The top arms are above the shoulder level, whereas the bottom arms are at shoulder level.
The role of each arm exchanges AT shoulder level, too.
Because of this, you’d need greater torso rotation to maximize the power of paddling.
Typically, this paddling style is for racing and paddling under dynamic water condition. So, you need to paddle this way if you want to paddle for speed or on rough water.
5.1.2 Paddling phases
Now, let’s talk about forward stroke paddling phases. Shall we?
Can you believe a paddling cycle only takes a second or 2? And within this short period of time, there are so many things happen.
Here we are to discuss in detail.
5.1.2.1 Catch phase
Hold your paddle with your bent top arm and your straight bottom arm. Place your blade into the water.
5.1.2.2 Power phase
Now, PUSH your top arm and PULL your bottom arm. As you are drawing the paddle, you’d notice your top arm is straightening whereas you bottom arm is bending.
Here’s where paddling power comes from. The kayak ACCELERATES.
So, remember to rotate your torso to optimize paddling range of motion.
5.1.2.3 Release and recovery phase
Once it reaches optimal torso rotation, release the blade out of the water.
At this phase, your forward arm becomes straight whereas your bottom arm is bent.
Once the blade exits the water, continue to push your top arm and lift your bottom arms. Here, the roles of arms exchange.
Also, the kayak DECELERATES at this point due to air and water resistance without paddling.
5.2 Leg drive
When you watch kayak sprinting, you’d notice the knees of those athlete moving up and down.
Sometimes, you wonder if this is natural, as your knees don’t move like that when paddling.
Let’s answer your question. Yes, it is natural.
Surprisingly, torso rotation drives leg movement. The greater the body rotates, the greater the knees move up and down. – You even can test it on your own at home.
So, is this essential in paddling? Yes, it is.
Leg drive complements paddling power by pushing and pulling both legs on footrest.
According to a study from European Journal Of Sports & Exercise Science, pulling forces at the footrest improves paddling power. Meanwhile, pushing force at the footrest doesn’t have significant relationship with power output.
In other words, pulling at footrest helps improve paddling performance.
This study is surprising. We always believe that pushing (pressing) the footrests improves paddling efficiency. But, it turns out to be the other way.
Nonetheless, it does prove that leg drive truly complements paddling power and thus, improves paddling performance.
So, remember to rotate your body and work on leg drive.
6. Balancing
A simple logic. If a kayak is not balanced, then it could capsize. Hence, it’s crucial to know how to balance the kayak when paddling.
Did you know where design of HULL greatly affects kayak stability? It could be flat, round, “V” shape, etc.
And these shapes affect both primary and secondary stability. Besides, both types of stabilities have INVERSE relationship.
6.1 Primary stability
This describes how stable the kayaks are at initial state, ie on calm water.
The wider the base of the kayak is, the better the primary stability is. So, kayaks with flat hull are perfect example.
In contrast, V-shape kayaks have low primary stability.
As you already know, wide-base kayaks are not great for paddling fast, due to greater water resistance. Hence, they are more suitable for RECREATIONAL paddling. And Sit-On-Top kayaks are perfect examples.
For paddlers, we couldn’t really do much to improve this, though. But, this is not the case for secondary stability, which we’ll discuss below.
6.2 Secondary stability
This describes how well the kayaks remain stable when they’re tipped on one side, without going beyond the point of capsizing.
As mentioned above, the better the primary stability is, the weaker the secondary stability. – And vice versa.
Hence, narrow-base kayaks, such as V-shape hull, usually have better secondary stability, as compared to wide-base kayaks.
And why should you know this? This is where you can master your balancing skills!
This is one of the essential kayaking skills that we should master to self-rescue and maneuver.
How to improve secondary stability? Well, you should master both EDGING and LEANING.
6.2.1 Edging
Edging is where you tilt your butt to one side but your upper body remains upright.
To remain stable, you might need to slightly extend your arms or the paddle on the side of your butt.
Essentially, it forms a “C” shape from your upper body to your butt.
6.2.2 Leaning
Leaning is where you lean your body to one side. At this point, the centre of mass SHIFTS and you are about to fall into the water.
To regain balance, you need to “BRACE” the water to act as temporarily support. There are 2 ways to do this:
6.2.2.1 Low bracing
Hold your paddle where your arms facing downward (paddle at your lower chest / belly level). The concave side of blade should face upward.
When leaning, hit the water with the CONVEX side of blade (concave side remains upward). This will create a temporarily moment for you to regain your balance.
6.2.2.2 High bracing
Hold your paddle at the shoulder level, so your arms form a “W” shape. Unlike low bracing, the convex side of blade should face upward.
When leaning, hit the water with the CONCAVE side of blade (convex side remains upward).
The purpose of high bracing is because it has greater power than low bracing. So, it is better for regaining balance.
7. Self-rescue
So, you’d probably learn balancing to reduce the chance of capsizing. Even if your kayak capsizes, your Personal Floatation Device, aka life jacket, can still save you.
But, if you want to excel in kayaking, you can do much better than that. That is learning self-rescue.
Here are some self-rescue skills that you can learn to make you more confident in kayaking:
- Wet exit drill – A technique where paddlers paddle a sit-inside kayak with a sprayskirt. This technique allows the paddlers escape from the flipped kayak to avoid drowning.
- Roll-over technique – This technique allows paddlers to roll the flipped kayak back to its original condition, without escaping from kayaks. The variation includes C–To-C Roll, Sweep Roll, T-Rescue, etc.
- Re-enter kayak – Get to learn how to re-enter kayaks the right way. Trust me. Some people can’t do it properly.
Bear in mind where you can’t practice alone the above skills and drills when kayaking. That’s because you might get drowned if you make any mistakes.
Hence, it’s always good to sign up for kayaking lessons to learn these skills. The coaches are there to:
- Teach you how to do them properly
- Observe and correct your posture
- Save you in case of drowning
8. River signals
As the name suggests, we use signals when kayaking on rivers.
Why not rely on verbal communication? Well, we might not hear properly when:
- There is too much noise around
- Great distance
Hence, we use body language or paddles to communicate with each other.
Don’t presume where we only need to learn river signals for whitewater kayaking. In fact, we can also use this for flat water and sea kayaking.
Besides, they are essential for group paddling.
8.1 Basic river signals
Honestly, there are multiple river signals to cover every possible condition. Hence, it takes time to learn all river signals.
But, you can learn the basic signals below:
- Are you ok? / Yes – Fist on your head. Apply for both question and reply.
- Stop / No – Spread your arms. Or, raise your paddle horizontally.
- Pointing direction – Use your hand / paddle to point to the direction.
- Need help – Wave your hands / paddle. Besides, you can blow whistle 3 times.
- Need first aid kit– Cross your arms in “X” shape in front of your chest or above your head. Also, you can blow whistle 1 time.
- Missed the paddle – Raise your hands upward. Close your fists and move in and out as if you are holding an “invisible” paddle.
- Eddy out – Draw circles and point to the direction.
However, river signals might vary amongst paddling groups. So, when you join different group, check with the group to see if there is any signal variation.
9. Synchronization
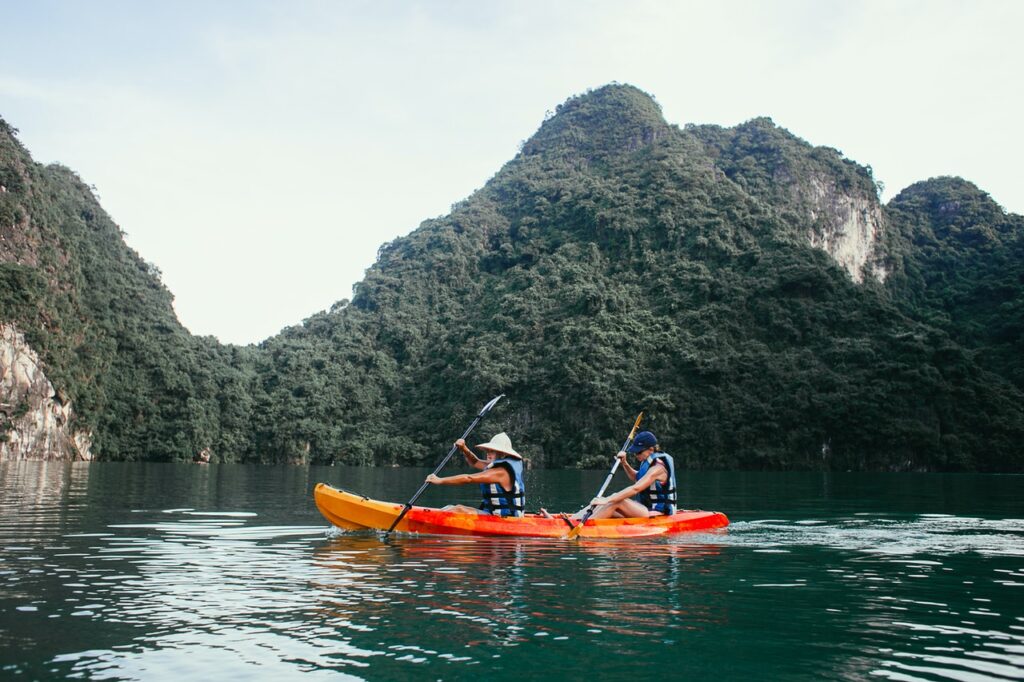
If you think solo kayaking is tough, then TANDEM kayaking is at another level.
Apart from the above kayaking skills, tandem paddlers need to master synchronization.
Synchronization means 2 or more paddlers paddling at the same TIMING and PHASE.
For example, both paddlers enter the catch phase and draw the paddle out of the water at the same time.
So, you notice K2 or K4 paddlers synch perfectly. And it’s pleasant to watch.
Wait. Is paddling in-synch a must?
Well, you already know that kayaks accelerate during CATCH phase and decelerate during RELEASE phase.
Why not paddle in such a way where the paddlers paddle both Catch and Release phases together? Shouldn’t this offset the deceleration? – Meaning, to paddle faster.
To address this, paddling in-sync helps:
- Avoid paddles hitting each other
- Paddle fast
Yup. Paddling in-sync helps paddle fast, but not otherwise.
There was a study from Burke, 2009, to compare the efficiency of in-sync and out-of-sync canoe paddling.
Burke, the author, noticed that during the power phase, the in-synch paddling speed was about 6.7mph. In contrast, the out-of-sync paddling speed was about 5.3mph.
Well, it is true where speed reduces during the release phase, but the drag force is not substantial.
Plus, if out-of-sync paddling offsets deceleration, it also means it RESTRICTS maximal paddling power. – Since this works both ways.
Although the above study refers to canoe paddling, the underlying principle is similar to kayak paddling.
9.1 How to sync?
You can work on the following matters:
- Order – Bow / front paddler should be the PACER. Stern / back paddler should be the STEERER.
- Strength – Weaker paddler should be the front paddler and stronger paddler should be the back paddler.If we flip the order, the strong paddler might set a fast cadence, which back paddler can’t follow.
- Rhythm – Paddling is like music. Imagine where the front paddler paddles without rhythm, how would you expect the back paddler follows the cadence?
- Teamwork – It’s common to paddle out-of-sync. So, blaming each other only makes things worse. Let’s work together.
10. Safety reading
As a basic rule, always check the water condition and environment before and during paddling. After all, we wanna make sure that we are safe when paddling.
For flat water kayaking, it might be easy to observe. – No big deal.
But, for whitewater or sea kayaking, this might be tricky for you.
These are much more turbulent than flat water kayaking. How do we make sure that we are safe?
That’s why you need to learn safety reading skills for whitewater and sea kayaking.
10.1 Whitewater kayaking
There are two famous whitewater reading scales, ie. International Scale of River Difficulty (former), and Whitewater Difficulty Scale (latter).
For this purpose, let’s look at the former scale as it is more common.
There are 6 classes within this system, i.e From Class I (Easy) to Class VI (Extreme and Exploratory Rapids).
The higher the class is, the greater the maneuver skills are.
For Class I, there is none or a few water waves or rough area. So, no maneuver skill is required. – Suitable class for beginners.
For Class VI, the water is turbulent, which includes huge waves, rocks, steep gradient, water falls, fast and strong current, and it is uncertain and vastly dangerous. – Any slight error could be fatal.
I’ve covered the latter scale in my earlier post. You can refer to the post if you are keen to know.
10.2 Sea kayaking
We observe traffic rules to avoid accidents and collision.
Sea kayaking is just like “driving” on the ocean. Thus, paddlers should learn voyage rules to avoid:
- Collision with other boaters
- Invading dangerous areas
Here’s where you should know how to read buoy and marks.
Before that, you need to know International Association of Marine Aids To Navigation And Lighthouse Authorities (“IALA”). – IALA Maritime Buoyage Systems.
Under this system, you need to know these marks:
- Lateral marks
- Cardinal marks
- Safe water marks
- Isolated danger marks
- Special marks
- Emergency marks
I’d covered these in my previous post. Check out the post to understand each type of marks.
Final thought: kayaking skills
Learning kayaking skills doesn’t only make you excel in forward paddling.
Apart from this, we need kayaking skills to maneuver and save ourselves if needed.
While this post may have loads of info, this doesn’t intend to give you step-by-step guidance to master all kayaking skills.
Instead, this post lets you be aware of the essential kayaking skills.
Hence, you can choose relevant kayaking skills to work on and improve the area. And this is crucial to be a well-rounded paddler.
Relevant posts