Kayaking is fun. That is why adults love kayaking and many people think that kayaking is for adults. But, what about kayaking for kids?
We always have this picture in our mind.
During the weekend, we load the kayak on our car. Then we drive to the lake or beach.
We then unload the kayak to the shore while carrying the paddles. Without wasting any time, we hop onto the kayak and start paddling.
Well, the point is, whether kayaking is suitable for kids as well? Can the kids learn kayaking?
Yes certainly! Kayaking for kids definitely is a good choice! There are kayaking lessons for the kids as well!
Although it is preferable to let your kids learn kayaking through proper kayaking lesson, you can choose to teach your kids learn kayaking by yourself!
So, this post provides some suggestions for parents that you can teach your kids learn kayaking.
1. Understand yourself
Do you realise that the teaching starts before your kids hop onto the kayak? Before you even think of how to teach your kids learn kayaking, you should understand yourself first.
Before teaching, you should have the ability to teach your kids about kayaking.
Firstly, you should have the basic UNDERSTANDING and KNOWLEDGE about kayaking. This means that you don’t need to be a kayaking expert to teach your kids learn kayaking. Sure, the basic understanding and knowledge will be covered in the sessions below.
Secondly, you should be COMFORTABLE with the water. So, if you know how to swim, then it is an added advantage. This is actually quite crucial if you know how to manage and save your kids in the event of capsizing.
Thirdly, your PARENTING style kicks in when it comes to teaching kayaking for kids. Why? Teaching kayaking for kids doesn’t only mean you want your kids learn kayaking, but more importantly to let them learn the RIGHT way.
2. Understand your kids
You’ll definitely need to know your kids whether they are ready to learn and it is suitable for them to learn.
2.1 Age
The first thing you need to consider is the AGE of your kids to see whether they are suitable for learning kayaking. – So, what age is suitable for learning kayaking?
Generally, there is no fix age requirement in kayaking for kids. But, according to the US Coast Guard, you can start to let your kids with age of 2 start kayaking in a TANDEM kayak with a parent with certain conditions. You can refer this article for better understanding on the conditions.
This article suggests that 5-year-old kids to paddle on a child-size kayak. If you kids are at least 12 years old, then you can consider a larger size kayak for them.
However, this is just a general guidance and the guidance may vary accordingly. The important thing is, you should assess the suitability of the age by yourself and have comfort before teaching your kids learn kayaking.
2.2 Ability to sit still
Next, get to know your kids whether they are able to sit still for a certain period of time. This is a crucial requirement because you need to make sure your kids are able to sit properly and remain calm while kayaking.
If otherwise, the kayak may keep wobbling and this might increase the chance of capsizing.
2.3 Water comfort
You kids should be comfortable with water, meaning they are not afraid of water. However, if your kids are scared of water, then you need to think twice before letting your kids learn kayaking.
There is question on Sit-On-Top vs Sit-Inside Kayak when it comes to kayaking for kids. – So, which one is more suitable for kids?
Generally, Sit-On-Top kayak is preferable because of the stability of the kayak. Compared to the Sit-Inside kayak, Sit-On-Top kayak has better PRIMARY stability which won’t wobble easily while staying on water.
Plus, even when capsizing, you kids can easily escape from the Sit-On-Top kayak which also effectively reduces the chance of drowning.
But, there is an exception. If your kids are above 12 and are good in swimming and comfortable in water, then you might consider a Sit-Inside kayak for them. There is a condition though. You kids need to learn Wet Exit drill, which is covered in the section below.
Above all, you should only teach your kids learn kayaking if you are comfortable and confident in teaching. If otherwise, signing up a kayaking lesson for your kids is always a preferable option.
3. Education
To me, educate your kids is the most important aspect when teaching your kids how to kayak. This is to instill correct perception on kayaking at the very beginning.
Effectively, this helps avoid your kids forming bad habit or bad technique in kayaking. If otherwise, they might find it difficult to break those bad habits down the road.
So, what do you need to educate them? You can refer to the factors below:
3.1 Safety measure
Educate them to put on Personal Flotation Device (“PFD”) and attach a whistle on the PFD when kayaking, whether they are good in swimming or not. – This is just like a compulsory requirement for driving.
Of course, you need to let them know swimming doesn’t give them the exception for not wearing a PFD, because the water conditions of the lake or the ocean are totally different from the swimming pool.
Next, putting on a PFD is not enough, but also need to choose the CORRECT size of the PFD. In the event of capsizing, a bigger-sized PFD might slip away whereas a smaller-sized PFD might not have enough buoyancy.
Well, your kids also need to know what to do when capsizing. For example, they might need to stay close to the kayak and use the whistle to ask for help. Or, they might need to know how to un-flip the kayak so that they can re-enter the kayak……
3.2 Gears and equipment
Teach your kids the importance of wearing for the water, not the weather. I know it is very tempting even for the adults to wear as few as possible because of paddling under the hot sun.
You need to let them know the purpose of wearing for water. This is really crucial because if your kids fall into the water, proper clothing can prevent HYPOHERMIA – loss of body temperature in cold water.
Furthermore, educate your kids to protect their skin while kayaking. So, they know the importance of wearing a hat and even applying sunscreen to reduce the chance of sunburn.
3.3 The right way to hold the paddle
Your kids can just grab the paddle and start paddling right away. But, this is not what you want your kids to do when they learn kayaking!
Teach them the right way to hold the paddle. Similar to holding chopsticks. There are tonnes of ways of holding chopsticks, but there is only ONE right way to hold the chopsticks. You know how difficult it is to correct the improper way of holding the chopsticks. – Same goes to paddling!
Teach your kids placing the paddle on their head between each side of the blades. Next, adjust the grips so that the angle of the elbows is 90 degree.
Apart from that, pay attention to the blades. A blade has two sides, ie. one smooth side and one non-smooth side. The shape of the blade is usually not symmetrical, ie. one edge is longer than the other edge.
To hold the paddle the right way, make sure the smooth side is facing your kids, with the longer edge above the shorter edge.
Right now, you may let your kids paddle with the UNFEATHERED paddle, because it is less technical and easier to hold than a FEATHERED paddle. But, this is totally up to you because you kids may prefer a feathered paddle.
3.4 Entering & exiting the kayak
This is always overlooked when kayaking for adults, not to mention kayaking for kids.
Again, you need to let them know the danger of improper entering and exiting the kayak, such as slipping from the kayak and getting injury.
You can demonstrate the right way of entering the kayak to them. Place the paddle on one side of the kayak, so that the paddle is parallel to the shore. You should place the paddle on the back of the cockpit, not the front of the cockpit.
Next, step on the kayak slowly with a hand pressing the paddle, so that it provides better stability when entering the kayak. Do the steps in reverse when exiting the kayak.
Let you kids do the same thing as you do. You have to be alert so that you may hold the kayak or hold your kids from falling down in case they lose balance.
4. Posture

Kids can be over-excited when they are sitting on the kayaking, and their posture may not be the right posture to paddle.
As mentioned in the above section, the ability to sit still on a kayak is very crucial, not only for the stability of the kayak, but also for the right way to paddle.
Just like how the adults sit while kayaking, your kids need to sit in a NEUTRAL position, which is sitting straight but relaxed.
Similar to adult, it is very tempting to lean back while paddling. However, your purpose is to instill the proper technique when they start learning to paddle. So, they won’t have to waste their time to break the bad habit and “relearn” the proper way in the future!
5. Navigation
Also, teach your kids the proper navigation strokes, instead of letting them paddling on their own without knowing how to navigate the kayak.
Introduce and teach them FORWARD, REVERSE, SWEEP and DRAW strokes. You kids may not be able to understand and differentiate the strokes yet, so you may need to be patient while teaching them.
Do you know that navigating the kayak is similar to driving? And, do you know that the paddling is related to Newton’s Third Law of Motion? – If yes, then you already have the idea on how to teach your kids the 4 strokes above!
- Forward stroke – Immerse the blade close to the bow of the kayak and navigate the blade to the back to create a forward motion. Rotate the torso and paddle the other side.
- Reverse stroke – Opposite of forward stroke. Immerse the blade close to the rear of the kayak and navigate to the front to create a backward motion. Rotate the torso and paddle the other side, too.
- Sweep stroke – Draw an arch or a semi-circle while paddling on the right hand side if want to turn to the left. Likewise, do the same on the left hand side if want to turn to the right.
- Draw stroke – Immerse the blade into the water, facing the kayak. Then, pull the blades to let the kayak move towards the paddle.
You should demonstrate the above strokes to your kids. If otherwise, it is very hard for them to understand without demonstration.
As mentioned above, EXPLAINING while teaching is far more important than merely let them know how to stroke, because your kids need to UNDERSTAND how each stroke works.
6. Tandem kayaking for kids
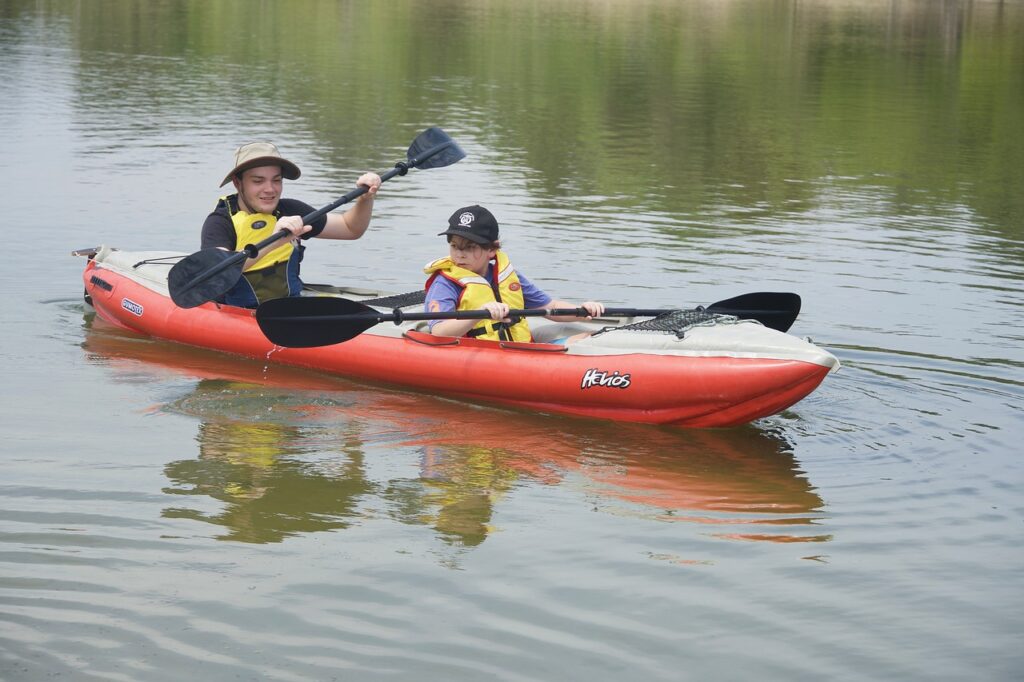
Tandem kayak is essential in kayaking for kids, especially when your kids haven’t reached the recommended age to paddle on a child-size kayak. Even if your kids are OK to paddle on a child-size kayak, you can still let them learn kayaking on a tandem kayak.
Why? It is because you have better monitoring and teaching on your kids’ paddling technique.
Make sure your kid sits in front of you. Next, you can give command to you kid to paddle, so that the paddling is SYNCHRONIZED.
Don’t expect your kid can paddle the right way, because it really takes time to let them understand how each navigation stroke works.
Be prepared to expect the propulsion comes from your paddling, not from your kid.
7. Keep them in vision
If your kids are paddling on their own, you have to make sure that they are not paddling too far away from the shore or the dock.
Never ever let your guard down and not aware of your kids’ whereabouts.
Or, another option would be paddling with them on a separate kayak. It is a better option than watching your kids paddling from the shore or dock, because you explore with your kids while paddling.
In addition, while sitting on your kayak, you can observe how well you kids are paddling on their own. You can immediately correct them and demonstrate them how to paddle correctly.
This is different from tandem kayaking where you kid is not able to watch your technique. They only can rely on your verbal teaching and command while learning how to paddle.
8. Set reliable expectation in kayaking for kids

Well, I guess you hope your kids are able to paddle the right way on their first kayaking session. But, let’s face the reality.
Your kids’ learning may not be as PERFECT as your expectation. So, better set a reliable expectation while kayaking for kids. – Otherwise, you’ll be frustrated if the reality doesn’t meet the expectation.
Don’t focus on perfecting the skills and the ability to paddle fast yet. Instead, focus on the ability to understand and execute each navigation stroke correctly.
Your kids are learning, so let them take their time and paddle on their own pace. You can correct their technique whenever is necessary.
Regardless of the progress of your kids is, remember to reward them and praise their effort in learning. It shows that reward can lead to the following positive impact:
- Encourage your kids’ good behavior
- Increase self-esteem
- Improve your relationship with your kids
That is right, your reward and praise can motivate them. This further helps in family bonding because you can polish your parenting skills by further understanding your kids.
For example, after the kayaking session, you can bring your kids to a restaurant for his favourite food or have any activities that your kids like.
9. Sit-inside kayaking for kids
As mentioned above, you can teach your kids paddling on a Sit-Inside kayak if they are 12 years old and comfortable in water.
Or, you can do the same if your kids are quite experienced in paddling to move your kids’ technique to the next level, ie. to improve stability and paddling efficiency.
9.1 Stability
Although Sit-Inside kayak is not as stable as Sit-On-Top kayak, we can improve the SECOND stability of Sit-Inside Kayak, ie. the ability to remain stable when the kayak wobbles without capsizing.
To improve the secondary stability, your kids need to learn how to EDGE and LEAN. Edging is where your kids are in balance when the kayak is titled. Leaning, on the other hand, is where the balance is outside the control.
For example, for edging, when the kayak is tilted to the left side, your kids need to learn to tilt their body to the right side to balance the stability.
For leaning, lean the body to left side so that the kayak is tilted to the left side, for example. Then, your kids need to use the paddle to “BRACE” the water on the left side, ie hit the water, to counter the capsizing.
This is an advanced drill so it is better to perform this under the supervision of a certified instructor.
9.2 Paddling efficiency
It’s time to let your kids explore the FEATHERED paddle. Similar to the above, you need to explain the purpose of using a feathered paddle to your kids so they understand and appreciate the advantages of a feathered paddle.
Teach them how to feather the paddle by offsetting the angle to see which angle works best for them.
Then, teach them how to grip the feathered paddle. For example, if your kids are right-dominant, make sure you kids offset to the RIGHT feathered paddle. Then, make sure your kids LOCK the right grip, and lets the left grip LOOSE to allow the shaft to “rotate” when paddling.
After you kids have tried both unfeathered and feathered paddle, let them decide which type of paddles works better for them.
10. Wet exit drill
This capsizing drill is necessary for the kids who are paddling on a Sit-Inside kayak with a SPRAY SKIRT. Even without the spray skit, this capsizing drill is also suitable for your kids to know how to escape from the kayak to prevent drowning.
Take note that this is an advanced drill which should be supervised by a certified instructor because your kids might drown if this is done incorrectly.
So, the following steps are just for information purpose and shouldn’t be a substitute for a professional kayaking lesson.
How to perform the wet exit drill
A certified instructor should be with your kids while performing the drill. The drill should be performed in either CALM lake or swimming pool.
There are 3 key steps in performing the drill.
Step 1 – Lean the body: Lean the body forward and hug the kayak. Take a deep breath and hold the breath. Then, your kids need to close their eyes and roll the body to either side to flip the kayak upside down.
Tap the kayak 3 times for T-Rescue.
Step 2 – Pull the grab loop. Your kids are in the water with the flipped kayak. Now, place the hands to the hips and slide the hands forward to find the grab loop. Pull the grab loop.
Step 3 – Push the kayak. To properly escape from the kayak, get the knees together, bend them and push the kayak with the hand so that your kids are able to come out and swim to the side of the kayak.
Ok, you can refer to the video below for better understanding.
Final thought: Kayaking for kids
Kayaking is not a privilege for the adults, but kayaking for kids is equally possible. Your kids can hop onto the kayak straight and start paddling without knowing any kayaking skills.
But, if you have a choice, you would like your kids to learn kayaking the proper way, right? So, let’s start teaching and educating your kids on how to kayak correctly at the very beginning, so that they won’t form a bad habit and are unable to break the habit in the future.
Kayaking is a fun activity. So, let’s kayaking with your kids once they are able to kayak!
Relevant posts