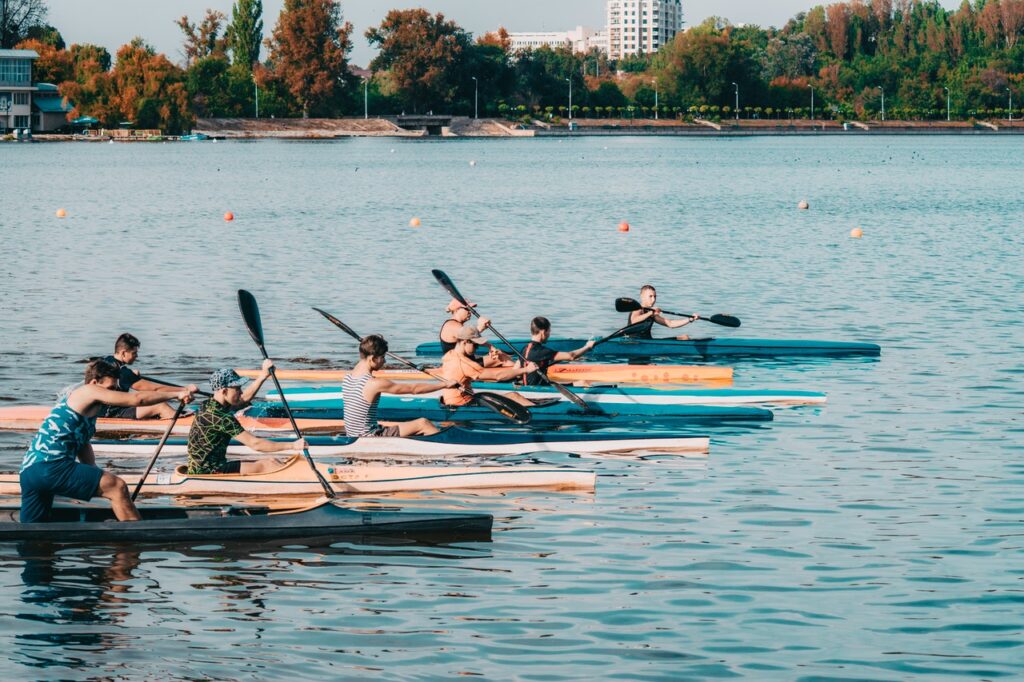
Whether you are new to kayaking or you’ve been paddling for quite some times, have you ever asked yourself this question? “How much do I know about kayaking strokes?”
And this is my first kayaking experience. As I didn’t have any idea about paddling, I asked the staff how to paddle.
“Just paddle left and right”, he replied casually.
So, I followed his advice. I’d gone through trial and error, as I wanted to know how this worked.
And guess what? It worked! I was thrilled and excited when the kayak moved forward or to the direction I wanted to go. – I felt like I had mastered kayaking, literally.
But, if someone asked me how much I knew about kayaking strokes, I don’t think I could answer this.
Now, I realize in order to excel in something, we need to know what we are doing. In this case, clearly we need to know about kayaking strokes.
So, what do you think? If you are thinking right now, then this post is for you.
Here I am to share 8 facts you must know to improve paddling.
1. Why do kayaking strokes matter?
I believe you know how to drive, don’t you?
So, what did you learn about driving? You learned how to move forward, change direction, reverse, safety precaution. – You learn how to control the car.
This is exactly the same as kayaking. Kayaks are also vehicles, so we need to know how to NAVIGATE and CONTROL kayak when paddling.
And that is why kayaking strokes matter!
We don’t just merely paddle “left and right”. Different kayaking strokes serve different functions.
Broadly speaking, they help us:
- Maneuver – move to the expected directions (forward, reverse, turn)
- Be safe – as in how to balance the kayak and self-rescue when capsizing
2. How to improve kayaking strokes?
To be great at kayaking, we can’t solely focus on particular strokes and ignore the rest.
To paddle well, you need to know how well you execute these kayaking strokes. – Meaning, efficiency matters.
They aren’t stand-alone, though. In fact, we should work on other factors with kayaking strokes to maximize their potential.
These factors include:
- Paddle holding – Get to know the right way to hold your paddle. And don’t hold the paddle too tight, as it will strain your wrist and arm. The way to hold the paddle should be the SAME for any kayaking strokes (discussed below).
- Posture and body rotation – Sit upright or slightly lean forward. Always rotate your torso when paddling.
- Vision – Your eyes drives the direction you wanna go. Also, it helps improve your DEXTERITY.
- Force – When paddling, always remember to both PUSH and PULL the shafts.
- Symmetry – Uneven paddling might make kayak tilt to one side. Also, learn to control the strength of your control hand to avoid uneven force.
3. How do kayaking strokes work?
When kayaking, you can think of Newton’s Third Law of Motion.
When you exert force in certain direction, there is another force acting in the opposite direction.
Let’s recall what you do when paddling. When you want to move FORWARD, what would you do? You draw the blade from the bow to the stern, right? – That is in REVERSE motion.
Or, when you want to turn to the RIGHT, you put your blade on the LEFT hand side and draw a semi-circle.
And the rest goes on……
Why should you know this by heart? This is the foundation of all kayaking strokes.
Some people struggle to paddle in a straight line. Well, this is also related to the principle.
The closer you draw the blade from the kayak, the better it moves in a straight line. In contrast, the further away you draw the blade from the kayak, the more it diverges from moving forward.
Hence, some paddlers might have asymmetrical paddling (ie. one narrow and one wide), which makes the kayak tilt to one side.
So, they might perform forward strokes (on one side) and sweep strokes (on the other side) without noticing.
4. What are the strokes for kayaking?
They are various types of kayaking strokes. Some are for maneuvering and some are for safety purposes.
For this purpose, we can classify them into two categories.
4.1 Basic
4.1.1 Forward
Place the blade in the water of bow’s section. The CONCAVE side of the blade should face towards you.
Then, pull the shaft backwards (to the stern) to create forward motion.
Your top arm should push the shaft at the same time.
Remember to rotate your torso. Once you reach the optimal torso rotation, release the blade out of the water.
Lift your bottom arm to the level above your head and repeat on the other side.
4.1.2 Reverse
Exact opposite of forward strokes. We use these to either slow down or navigate in reverse manner.
Despite that, never change the way you hold paddle.
Rotate your torso so you place the blade in the water of stern’s section. The CONVEX side of blade should face towards you.
Then push the shaft forward (to the bow) to create backward motion. Your top arm should pull the shaft, too.
Remember to rotate your torso when drawing forward. Then, release the blade out of the water.
Lift your bottom arm and repeat on the other side.
4.1.3 Sweep and reverse sweep
Sweep strokes are similar to forward strokes, but are used to TURN the kayak.
If you want to turn to the LEFT, place the blade in the water of RIGHT bow’s section. Then, draw a SEMI-CIRCLE.
Do the same on the opposite side if you want to turn to the right.
Also, you can do it in REVERSE manner, hence called reverse sweep strokes. And these are totally opposite of sweep strokes. – So, you will turn to the SAME side.
In essence, paddlers draw semi-circles from the stern to the bow.
If you want to turn to the left, draw the semi-circle at the left side. Vice versa.
Again, remember:
- To push and pull the shafts
- To Rotate your torso
- Not to change the way of holding paddle.
4.1.4 Draw
Draw strokes allow kayaks move PERPENDICULARLY. These strokes are useful when you want to move your kayak towards docks / shores or other paddlers.
4.1.4.1 Basic draw
Extend your arm and place the blade in the water away from you. The concave side faces towards the kayak. Pull the shaft towards you so your kayak moves towards the blade.
Release the blade out of the water while the concave side still faces towards you. Extend your blade again and repeat.
There is another variation of releasing the blade. Instead of releasing the blade out of the water, twist your wrist so that the edge of blade faces towards you.
Then, extend your arm again and re-twist your wrist so that the concave side faces towards the kayak. You do this without drawing the blade out of the water.
4.1.4.2 Sculling draw
These are slightly more advanced, powerful than basic draw strokes.
Place the blade in the water. Twist your arms and draw the blade back and forth to create sculling motion.
Remember, the concave side of blade always faces INWARDS.
There is no release phase in sculling draw strokes. You don’t have to pull out the blade. You just need to repeat this sculling motion.
4.1.5 Pry
These are the total opposite of draw strokes. But, they serve the same purpose.
Instead of drawing the kayak towards the blade, you can do the opposite to make the kayak move away from the blade.
And you just need to flip what you know about draw strokes.
For example, you want to move to the right side. So, you can place the blade on the left side right next to you. Then, push the shaft away from you and repeat the process.
To be honest, you might want to ignore these as draw strokes are more common and intuitive to use.
It is great if you practice these strokes. But, it’s also fine if you don’t and you prefer draw strokes.
4.2 Advanced
4.2.1 Rudder
Paddlers need to be familiar with EDGING.
They are used to TURN kayaks, just like sweep strokes. However, rudders have to be done when the kayak is MOVING. Essentially, they use moving motion to help change the direction.
With that being said, there are 2 types of rudders:
4.2.1.1 Bow rudder
Let’s say you want to turn to right side. Before executing bow rudder, paddle a bit to make the kayak move forward.
Then, EDGE your body to the left and place the blade in the water of the right bow’s section.
Take note where the angle of blade should be NEUTRAL with the concave side of blade faces towards the kayak bow.
Keep that position. Let the momentum do the work and you’ll notice your kayak will turn to the right side.
Do the opposite if you want to turn to the left side.
4.2.1.2 Stern rudder
Stern rudders are also used to TURN the kayak, but it might cause more drag than bow rudders.
Practically, stern rudders can be used in downwind, which hinders kayak from moving straight.
Hence, these help adjust the direction, so the kayak can move straight.
Similar technique as above, but you need to rotate your torso to place the blade in the water of stern’s section.
The concave side of blade should face towards the kayak stern.
4.2.2 Brace
When paddlers LEAN and if their centre of mass is outside the centre of buoyancy, the paddlers lose balance.
To counter this, paddlers “brace” the water as a temporary support to regain balance. There are two ways to do this, ie. low bracing and high bracing.
So, brace strokes are mainly used for regaining balance to avoid capsizing. – So, they are SELF-RESCUE strokes.
Despite this, brace strokes can also be used for MANEUVERING.
Now, let’s see how brace strokes work in kayaking.
4.2.2.1 Low bracing
Hold your paddle where your arms facing downward (paddle at your lower chest / belly level). The concave side of blades should face upward.
Lean to either side until you lose balance. Then, hit the water with the CONVEX side of blade (concave side remains upward). This will create a temporarily moment for you to regain your balance.
For SELF-RESCUE, you can practice this when the kayak is still.
For MANEUVERING, you can use low brace turns when your kayak is moving forward. Furthermore, you will be bracing the water, instead of hitting the water.
For example, you wanna turn right and you use low brace turn. When your kayaking is moving forward, lean your body and also brace your paddle on the right hand side.
This creates drag on the right hand side. So, it allows the kayak turn to the right hand side with the support of momentum.
4.2.2.2 High bracing
Hold your paddle at the shoulder level, so your arms form a “W” shape. Unlike low brace turns, the convex side of blades should face upward.
Lean to either side until you lose balance. Then, hit the water with the CONCAVE side of blade (convex side remains upward).
The purpose of high brace turns is they are more powerful than low brace turns. So, it is better for regaining balance.
Practice this when the kayak is still, too.
For maneuvering, practice high brace turns when the kayak is moving. Make use of the momentum to turn. – Just like how you’ll do the low-brace turns.
4.2.3 C-stroke
These are COMBINATION of forward strokes and draw strokes.
When we draw forward strokes, our kayaks don’t entirely move straight. They’ll slightly tilt to the opposite direction.
Because of this, some paddlers perform draw strokes at the bow section to “correct” this slight tilt. Then, they draw the paddle backward as if the normal forward strokes.
These are very similar to J-strokes in canoeing. – In fact, C-strokes are like inverted J-strokes.
Nonetheless, you rarely see flat water paddlers execute these due to longer time to perform these.
But, they could be quite useful if you want to paddle WHITEWATER.
4.2.4 Other self-rescue strokes
These are advanced skills that you need to practice with guidance. I don’t recommend learning on your own as you can drown easily if you make any mistakes.
However, you roughly know what self-rescue strokes are about. So, you know what strokes you can learn in future.
Basically, you learn how to re-roll your kayak back to its original state without escaping from the kayak in the event of capsizing.
There are some variations, such as C-To-C Roll and Sweep Roll.
Depending on your preference, you may need to focus and master just one of these.
4.3 Bottom line
The above strokes seem distinctive to each other. In fact, once you are familiar with these kayaking strokes, you can actually MIX-AND-MATCH to improve maneuver.
For example, you can perform forward sweep and reverse sweep strokes together. This allows your kayak turns 180 degree.
Or, when doing bow or stern rudder, you can slightly rotate your torso and cross your arm to plant the blade on the opposite side. – Hence, there are called CROSS bow or stern rudders.
5. Sweep strokes vs rudder strokes in kayaking
Ok. Both types of strokes are used in TURNING kayaks.
But, the question is “should we learn both?”.
Also, which one is better?
5.1 Sweep strokes
- Easy to learn, very intuitive
- Use a lot of space
- Use more energy
- Can perform these while the kayak is moving or still
- Reduce the speed
- Can adjust the degree of turn by controlling the arch of the sweep. Meaning, if you want to make a small turn, you just need to draw partial arc.
5.2 Rudder strokes
- Harder to learn, as need to be familiar with edging
- Can perform this when there is narrow space
- Use less energy
- Only can perform these when the kayak is moving
- Slightly reduce or even maintain the speed
- Can adjust the degree of turn by controlling the position of blade placement, or the degree of wrist twist.
As you can see, both have their pros and cons. For recreational and flat water paddling, sweep strokes will be your choice.
But, if you paddle whitewater, you definitely need to master rudder strokes.
6. What is the most common kayak paddling stroke?
Well, well, well……
I’m pretty sure you already have the answer in your mind, right? Otherwise, you won’t be interested in kayaking, will you?
Yes, you are right! The most common kayaking stroke is the FORWARD stroke. Hands down!
Alright, this is not the end of it.
Despite the name, kayaks never truly move in a straight line. There’s always a “zig zag” pattern when paddling forward. – Thanks to Newton’s Third Law of Motion.
When you catch the water on one side, your kayak will also move to the other side to EQUALIZE the effect of the forces. – That explains the purpose of C-strokes.
Don’t believe me? Try to paddle slowly. The “zig zag” effect is very obvious.
But, we can reduce the “zig zag” pattern by paddling FASTER. When the pattern is reduced, it gives an impression that the kayak is moving in a straight line.
However, never ever OVERLOOK other types of kayaking strokes. You need them when there are obstacles or you need to avoid any collision.
7. What are the three phases of a forward stroke kayak?
A forward stroke might take less than 1 or 2 seconds to complete. The time is even shorter for kayak sprinting.
Within this short period of time, a lot of technical things happen without our attention.
And for this purpose, we can broadly break this into 3 phases:
7.1 Catch phase
Hold your paddle as usual. Then, place either one of the blade into the water.
At this point, your torso and your paddle will roughly form an “A” shape.
Look at your top and bottom arms. Your top arm is bent whereas your bottom is straight.
7.2 Power phase
Remember how you execute force when paddling.
Now, PUSH your top arm’s shaft and PULL your bottom arm’s shaft to draw the paddle.
Notice where your bottom arm is bending and your top arm is straightening.
This is where paddling power comes from. During this phase, your kayak ACCELERATES.
To optimize this, remember to rotate your torso.
7.3 Release and recovery phase
Once you reach optimal torso rotation, release the blade out of the water.
During this phase, your forward arm straightens whereas your bottom arm is bent.
Once the blade exits the water, lift your bottom arms to the level above your shoulder. Here, the roles of arms exchange.
At this point, your kayak DECELERATES due to air and water resistance without paddling.
Repeat the above steps on the other side.
7.4 Point to note
Although these phrases refer to forward strokes, you’d notice these are also relevant for other strokes, such as reverse, draw, etc.
This is what you need to take note. When we catch the water (power phase), this creates paddling MOTION.
When we release the blade out of the water, there’s no paddling power at this moment. So, the kayak moves as per the momentum. – Hence, it slows down or eventually stops.
8. What is the optimal stroke rate?
In running, runners are eager to know the optimal cadence to run fast with the least amount of energy.
Same goes to kayaking.
But, stroke rates for recreational kayaking and kayak sprinting differ.
For recreational kayaking, you might expect stroke rate of 40 strokes per minute (spm). For kayak sprinting, the stroke rate could be 90 spm or even more, depending on the length.
Clearly, distance is a crucial factor that influences the stroke rate.
What if you want to paddle fast as long as you can?
Meaning, we wanna know the optimal stroke rate for LONG-DISTANCE kayaking.
There is a study published by Biology Of Sport on the optimal paddling rate for long-distance kayaking. 11 elite long-distance male kayakers took part in this study.
The researchers studied the relationship between oxygen uptake and target stroke rate. And they chose the following rates:
- 65 spm
- 75 spm
- 90 spm
- Freely chosen stroke
At the end of the study, they found that:
- There was a U-shaped relationship between oxygen uptake and target stroke rate
- 75 spm had the least VO2% (optimal stroke rate)
- Freely chosen stroke rate was lower than 75 spm. (67 spm on average)
8.1 What does this mean?
Based upon our natural stroke rate, it’s unlikely that we hit 75 spm or more.
To increase paddling efficiency, we might want to increase our stroke rate and use this as a benchmark for training.
Final thought: kayaking strokes
Forward strokes are not the only strokes in kayaking.
Don’t forget that we still need to change direction or avoid any collision.
Just like driving. We won’t be only pressing the accelerator and nothing else. We need to steer the steering wheel and press the brake, too.
As we know better about various kayaking strokes, we know what we should look into and improve.
Relevant posts: